We are one of UAE’s leading outdoor heater Supplier.Our Outdoor Patio Gas Heaters range comprises of outdoor heaters, patio heaters accessories, Patio Heaters, Outdoor and Patio Gas Heaters (mushroom, pyramid, and circular flame tube shapes) and electrical outdoor heaters.We also offer outdoor heater rental service for all Dubai and Abu Dhabi customers.
Outdoor Heaters in Dubai Products
The patio is a space for people to enjoy their time with seeing around the landscape or views. This is a kind of nice space for people to have for their house because it can bring more time to relax after the tiring day. Talking about enjoying the landscape, Dubai is a place with the best landscape of modern life. Having a time in Dubai with the patio will be a beautiful thing in this life history. However, considering that Dubai has extreme weather, at night we need the additional stuff to keep the enjoyment from the patio still in the great atmosphere. This has the relation with patio heaters in Dubai.
Speaking about the patio heaters, Outdoor heaters in Dubai are available in many different styles and specifications. Speaking about the products, we can find what we need for the patio heaters. Many different styles of the patio heaters bring different function for each consumer. About the product in Dubai, the particular design is made with the elegant and modern style so we can have the similar decoration just like the Dubai city has. About the price, there will be an excellent quality alongside with the price. Find the best outdoor heaters products here in Dubai.
SPECIFICATIONS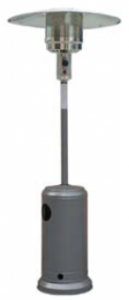 |
|
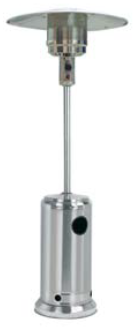
| Model | Outdoor heater |
| Type of Gas | LPG |
| Operating pressure | 2.8kPa |
| Injector size | Identification marked |
| Gas Consumption | 870gr/hr at MAX |
| Heat output | 9000 – 43000 BTU / 13kW |
SPECIFICATIONS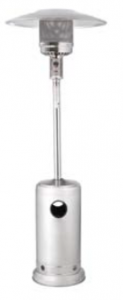 |
|
| Model | Outdoor Gas Patio Heater |
| Type of Gas | LPG |
| Operating pressure | 2.8kPa |
| Injector size | Identification marked |
| Gas Consumption | 870gr/hr at MAX |
| Heat output | 9000 – 43000 BTU / 13kW |
SPECIFICATIONS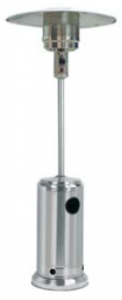 |
|
| Model | Out door Gas Heater |
| Type of Gas | LPG |
| Operating pressure | 2.8kPa |
| Injector size | Identification marked |
| Gas Consumption | 870gr/hr at MAX |
| Heat output | 9000 – 43000 BTU / 13kW |
SPECIFICATIONS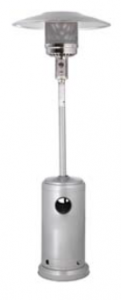 |
|
| Model | Mushroom Heater |
| Type of Gas | LPG |
| Operating pressure | 2.8kPa |
| Injector size | Identification marked |
| Gas Consumption | 870gr/hr at MAX |
| Heat output | 9000 – 43000 BTU / 13kW |
SPECIFICATIONS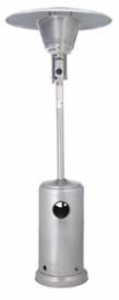 |
|
| Model | Outdoor Patio Heater |
| Type of Gas | LPG |
| Operating pressure | 2.8kPa |
| Injector size | Identification marked |
| Gas Consumption | 870gr/hr at MAX |
| Heat output | 9000 – 43000 BTU / 13kW |
SPECIFICATIONS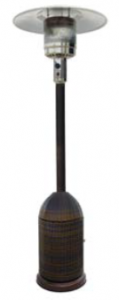 |
|
| Model | Patio Heater |
| Type of Gas | LPG |
| Operating pressure | 2.8kPa |
| Injector size | Identification marked |
| Gas Consumption | 870gr/hr at MAX |
| Heat output | 9000 – 43000 BTU / 13kW |
Outdoor Heater faqs:
Q: What is a flame failure protection device?
A: If the pilot flame dies, the thermocouple system will cool down instantly. The sensor will close the electromagnetic valve cutting the gas flow off. This will stop the gas from flowing through the system, turning the heater off.

Q: What is Patio heater on-off switch?
A: A positive off switch enables the user to switch the appliance off without having to close the valve on the cylinder (like a stove).
Q: How long is the Outdoor heater supposed to burn for?
A: Refer to your instruction manual or technical data sticker on the back of your heater. It will supply the g/h (grams per hour) consumption. Take the weight of your gas cylinder e.g. (9kg = 9000g) and divide it by the g/h of your appliance.
The total you get will be the maximum amount of hours the appliance will be able to burn for. (eg. 9000g / 870g/h = 10hrs at max)
Outdoor Patio Heater Set Up:
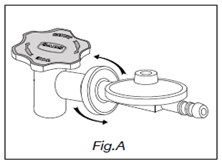
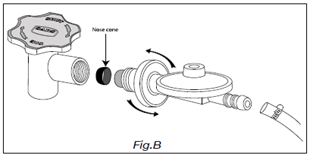
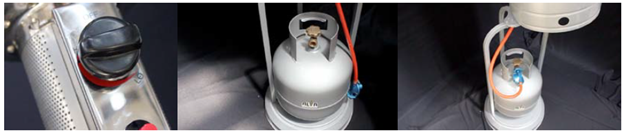
This heater makes use of an industrial cylinder (9kg cylinder recommended) with a 5/8” BSP thread; horizontal exit valve. The Bullnose regulator supplied with the heater tightens to the left-hand side (anti-clockwise). (Figure A) If you have bought a new gas cylinder, the cylinder needs to be purged (cleared out), before its first use. If it is not purged of air, the heater will not work properly. This should happen at the gas filling station when you fill up the cylinder. Always check this with your gas supplier.

This heater makes use of an industrial cylinder (9kg bottle recommended) with a 5/8” BSP thread; horizontal exit valve. The Bullnose regulator supplied with the heater tightens to the left-hand side (anti-clockwise). (Figure A) If you have bought a new gas cylinder, the cylinder needs to be purged (cleared out), before its first use. If it is not purged of air, the heater will not work properly. This should happen at the gas filling station when you fill up the cylinder. Always check this with your gas supplier.
- Advise customers to be sure that this is the product they need before opening and removing the heater from the packaging.
- Assemble the unit.
- Check if the nose cone is present, secure and in good condition. (Figure B)
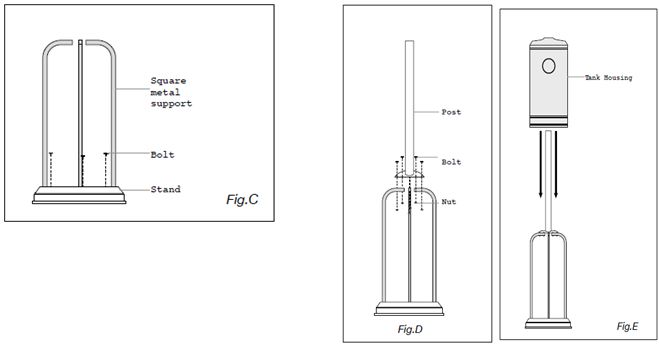
- Place the three post brackets into position on the base. Use three M8 x 16mm bolts to join the post brackets to the stand. (Figure C)
- Place the post on top of the three post brackets. Use six M6 x 35mm bolts and nuts to connect the post to three post brackets. Tighten the bolts and nuts. (Figure D)
- Place the tank housing on the stand. (Figure E )
- Take the burner head with the hose already attached and feed the hose through the post. Fix the completed lamp unit to the position using four M6 x 10mm bolts; ensure the “Heater Operation Label” faces the same way as the gas controls.
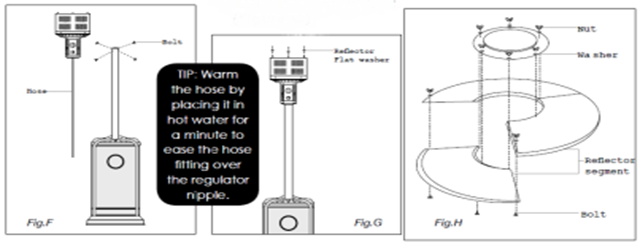
- Take the burner head with the hose already attached and feed the hose through the post. Fix the completed burner unit to the post using four M6 x 10mm bolts; ensure the “Heater Operation Label” faces the same way as the gas controls.
Patio Heater Set Up (Contd.):
Attach the supplied regulator to the hose end.(Figure F)
- Tighten all loose nuts and bolts. Place an 8mm washer on each reflector support pin. (Figure G)
- Assemble the four piece reflector according to Figure H.
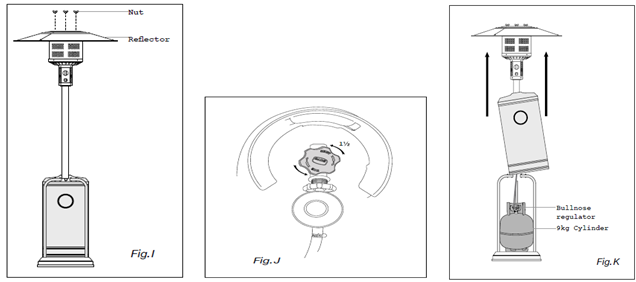
Fasten the reflector with three washers and three M8 x 8mm castle nuts. (Figure I)
- Lift up the tank housing and rest it on the post plate. Screw the regulator into the cylinder valve. DO NOT use a tool to tighten the regulator; it is to be hand-tightened only. Open the cylinder valve 1½ turns to the left (anticlockwise). (Figure J) Put LPG gas tank on the stand. (Figure K)
Perform the leak test.
Leak Test:
The leak test must be carried out in a well-ventilated area, free from any flames or other sources of ignition.
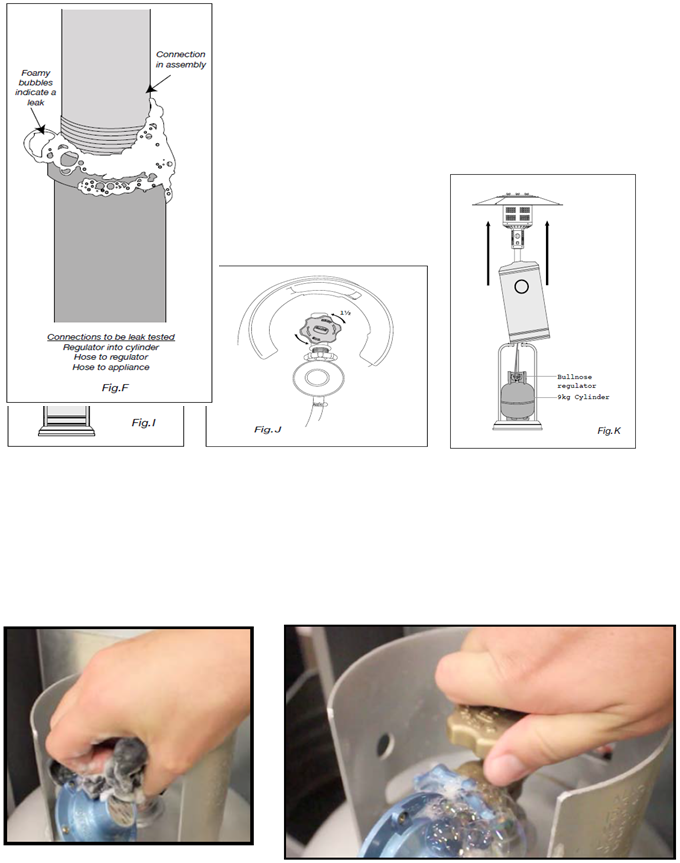
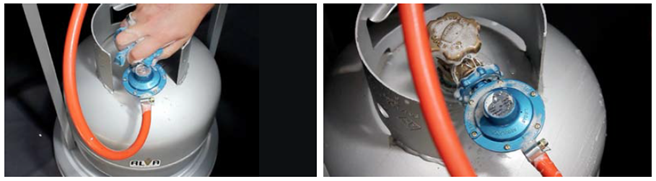
- With the cylinder connected to the heater. Open the cylinder valve.
- Brush the connections (heater to cylinder) with a solution of equal parts soap and water (make sure it’s foamy).
- A stream of bubbles forming indicates a gas leak. (See Fig.F)
- If bubbles appear, turn the cylinder valve OFF (clockwise) and disconnect the heater from the gas cylinder.
- Tighten the connection and retry the leak test.
- If you are unsure or if you cannot tighten the connection, place the cylinder outside in a cool, well-ventilated area and contact us.
- A leak between the heater and cylinder can lead to a high pressure fire, which is very dangerous and can result in extensive injury or even death.
Using Your Patio Heater:
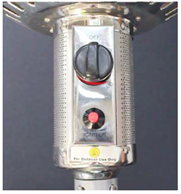
This heater must be turned off using the control knob first and only then closing the cylinder valve.
This heater has a positive OFF valve. Use the control knob to turn it OFF before closing the cylinder valve.
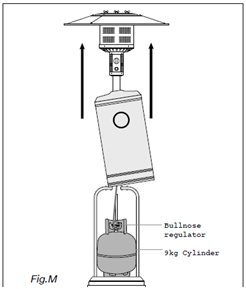
Changing The Cylinder:
Make sure you cylinder valve is closed (by turning it clockwise). Allow the heater to fully cool before replacing the cylinder. Lift up the tank housing and tilting it so that the reservoir housing support holds the container housing up, exposing the cylinder fully. Allowing you to access and replace the cylinder. (Figure M) Remove and replace the cylinder.
ALWAYS check that the regulator-sealing washer (nose cone) is intact and in place before reattaching the regulator to a cylinder.
DO NOT attempt to remove the regulator while the heater is on or if the cylinder valve is not closed.
- Check all the connections before each use.
- Turn the gas control knob to the OFF position.
- Open the gas cylinder valve 1½ turns (anticlockwise).
- Gently push in the control knob on the heater and turn it to the HI position.
- Keeping the control knob pushed in, press the igniter button. The burner will light. Keep the knob depressed for another 10 seconds to allow the flame failure safety device to activate.
- Once the burner burns with a steady flame, select your required heat setting.
- When lighting the outdoor heater the first time, you may have to keep the control knob depressed a little longer to allow any air in the system to remove.
- If the heater does not ignite the first time, wait for 5 minutes and repeat the lighting instructions. If you still experience ignition problems, contact us for assistance.
Maintenance:
- Always make sure the heater is OFF and cool, with the cylinder valve closed, before conducting any maintenance.
- Your heater should be checked once a year by a qualified technician. If faults are suspected or detected, stop using the heater and contact us.
- Clean the exterior and storage area of your heater when required to remove dust.
- DO NOT use abrasive products to clean the heater; these may damage the paint work.
- Check the burner and remove any debris, dirt, spider webs or wasp nests from the burner ports by using compressed air or a pipe cleaner.
- DO NOT clean the burner with water or tamper with the Jets. If a jet is blocked, it must be replaced with an original manufacturer marked aircraft.
- Replace parts and allow the heater to dry properly before storing.
- If the gas control or ignitor is exposed to water or gets wet, dry it properly before attempting to light the heater. You might have to replace the parts if the heater does not ignite.
- The airflow must not be obstructed. Keep the controls and burner passage clean.
- Clean with a soft brush or blow clean with compressed air.
- Your heater should be checked once a year by a qualified technician. Take special care to retighten any fixtures or nuts and bolts that have come loose.
Signs of a blockage:
- Gas odor with extreme yellow tipping of the flame
- Heater does not reach the desired temperature
- Heater glow is excessively uneven
- Heater making popping sounds
- Heater ‘Flashes back’ in burner tube
Important Safety Information:
- For outdoor use only.
- For use with Liquefied Petroleum Gas only.
- DO NOT use within 1m of any flammable surfaces.
- Always turn OFF the gas supply at the cylinder after use.
- DO NOT store flammable materials or another cylinder near the heater
12 Month Peace Of Mind Repair Warranty:
- Our Patio gas Heaters are warranted to the original purchaser to be free from defects in workmanship and materials for a period of 12 months from the date of purchase.
- The retailer, distributor, or manufacturer will not be liable for incidental or consequential damage, or loss as a result of the installation and operation of this product.
- These outdoor gas heaters are manufactured from powder coated mild steel. If it does not care for and maintained correctly, corrosion can and will occur. This is considered normal wear and tear and is not warranted.
- Modifying or tampering with any part of the BBQ is illegal and unsafe and will void your warranty.
The Outdoor Heater should be serviced annually by a registered competent person.
How Our Service Dept. Attends To Calls Logged:
- If a customer contacts our call centre, they will speak to one of our highly trained customer service staff, who will troubleshoot their problem over the phone with them.
- If they are unable to solve the problem telephonically successfully, the customer’s details are taken, and a highly trained technician is dispatched to their premises.
- If the problem is covered under warranty for that product, then there is no cost to the client for the call out and repair work.
- If the problem is not covered under the product warranty, then the customer is liable for the cost of labor and parts.